Composition
In a real program, it is almost never enough to have all of the UI logic and visuals in one place. Almost always it is beneficial to split up the UI into smaller parts, usually located in separate modules, be it for clarity and maintainability or for reuse.
This page describes different patterns of such decomposition supported by Elmish.
- Partial view functions
- Composing full-fledged components
- Dedicated event loop
- Higher-order message pattern
Partial view functions
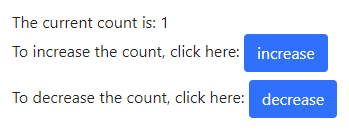
The simplest way to split up a big UI is to extract some parts of its view function as separate functions, what in some contexts might be called “partial view”. For example, consider the bespoke counter UI:
type State = { count :: Int }
data Message = Inc | Dec

view :: State -> Dispatch Message -> ReactElement
view state dispatch =
  H.div ""
  [ H.div "" $ "The current count is: " <> show state.count
  , button "increase" (dispatch Inc)
  , button "decrease" (dispatch Dec)
  ]

button :: String -> Effect Unit -> ReactElement
button text onClick =
  H.div ""
  [ H.text $ "To " <> text <> " the count, click here: "
  , H.button_ "btn btn-primary" { onClick: H.handle \_ -> onClick } text
  ]
Here, we have extracted the visuals for “increase” and “decrease” buttons as a partial view function named button, which is then used twice in the main view function.
NOTE: such “partial view” function doesn’t have to be just a visual. As seen in this example, it can produce messages as well.
Often, especially with larger partial views, it’s beneficial to name their parameters by gathering them in a record:
view :: State -> Dispatch Message -> ReactElement
view state dispatch =
  H.div ""
  [ H.div "" $ "The current count is: " <> show state.count
  , button { text: "increase", onClick: dispatch Inc }
  , button { text: "decrease", onClick: dispatch Dec }
  ]

button :: { text :: String, onClick :: Effect Unit } -> ReactElement
button { text, onClick } =
  H.div ""
  [ H.text $ "To " <> text <> " the count, click here: "
  , H.button_ "btn btn-primary" { onClick: H.handle \_ -> onClick } text
  ]
Composing full-fledged components
Partial view functions are great, because they’re simple, but sometimes it does make sense to package away a whole piece of complex UI logic - either for reuse or just for code organization. This setup is usually referred to as “child components”.
For example, let’s say we wanted to create a UI consisting of two such counters as shown above:
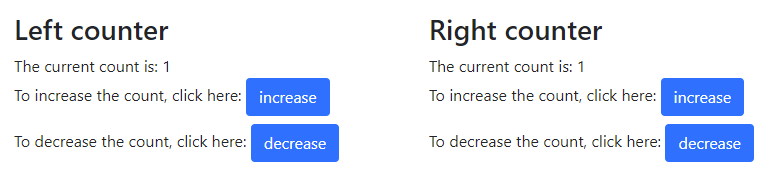
To do this, we would aggregate the two counters’ states, route their messages and state transitions, and compose their views:
import Counter as Counter

-- Aggregate child components' states
type State =
  { left :: Counter.State
  , right :: Counter.State
  }

-- Aggregate child components' messages
data Message
  = LeftMsg Counter.Message
  | RightMsg Counter.Message

view :: State -> Dispatch Message -> ReactElement
view state dispatch =
  H.div "row"
  [ H.div "col-6"
    [ H.h3 "" "Left counter"
    , Counter.view state.left (dispatch <<< LeftMsg)
    ]
  , H.div "col-6"
    [ H.h3 "" "Right counter"
    , Counter.view state.right (dispatch <<< RightMsg)
    ]
  ]
Note how we’re calling Counter.view twice, but passing it different states (left and right) and different Dispatch functions - one wrapping Counter’s messages in LeftMsg and the other wrapping them in RightMsg.
So far so good. But what about the update function?
Since Transition is a pair of state + effects (see Transition: Under the Hood), we could do it the straightforward way:
- Call
Counter.update - Unwrap the resulting
Transitionto obtain the new counter state and any effects. - Plug the new counter state into the aggregate
State - Modify the effects to wrap all messages they produce in
LeftMsg(orRightMsg). - Reconstruct
Transitionout of the new aggregateStateand the modified effects.
This is what your typical Elm program does, and it would look something like this:
update state (LeftMsg m) =
  let Transition s effs = Counter.update state.left m
      state' = state { left = s }
      effs' = map LeftMsg <$> effs
  in
    Transition state' effs'
This is straightforward, but in practice this becomes very tedious very fast. So instead, we could use the fact that Transition is a monad (to thread the state via bind) as well as a Bifunctor (to wrap the effect messages via lmap). This would look somewhat like this:
update state (LeftMsg m) = do
  s' <- lmap LeftMsg $ Counter.update state.left m
  pure state { left = s' }
NOTE: See the Transition page for a detailed description of how the do notation works with Transition
Or even better: for a straightforward mapping like this, without any extra processing, we could use just the Bifunctor aspect of Transition and map both messages and state via bimap:
update state (LeftMsg m) =
  bimap LeftMsg state { left = _ } $ Counter.update state.left m
NOTE: This syntax works because of how PureScript’s record updates are parsed. The expression state { left = _ } is a single term, equivalent to a function \x -> state { left = x }
Armed with this knowledge, we can now write the full update function of the composed component:
update :: State -> Message -> Transition Message State
update state (LeftMsg m) =
  bimap LeftMsg state { left = _ } $ Counter.update state.left m
update state (RightMsg m) =
  bimap RightMsg state { right = _ } $ Counter.update state.right m
This mode of composition is sure less tedious than in Elm, but still heavy compared to the partial view functions. Use with care.
Dedicated event loop
Aggregating child component’s state and message into those of the parent component is the standard composition procedure in The Elm Architecture. Sometimes, however, it turns out to be very inconvenient for no reason.
Say we wanted to display two areas of our UI in “collapsible panels” - i.e. a header with a button that shows or hides contents:
module CollapsiblePanel where

type State = { collapsed :: Boolean }
data Message = Toggle

view :: { title :: String, content :: ReactElement } -> State -> Dispatch Message -> ReactElement
view { title, content } state dispatch =
  H.div ""
  [ H.div_ "bg-light" { onClick: H.handle \_ -> dispatch Toggle } title
  , if collapsed
      then H.empty
      else H.div "" content
  ]

update :: State -> Message -> Transition Message State
update { collapsed } Toggle = { collapsed: not collapsed }

--------------------------------------------
module Parent where

import CollapsiblePanel as CP

type State =
  { ...
  , panel1 :: CP.State
  , panel2 :: CP.State
  }

data Message
  = ...
  | CP1Msg CP.Message
  | CP2Msg CP.Message

view :: State -> Dispatch Message -> ReactElement
view = ...
  , CP.view { title: "Panel 1", content: H.text "Content 1" } state.panel1 (dispatch <<< CP1Msg)
  ...
  , CP.view { title: "Panel 2", content: H.text "Content 2" } state.panel1 (dispatch <<< CP2Msg)
  ...

update :: State -> Message -> Transition Message State
...
update state (CP1Msg m) =
  CP.update state.panel1 m
  # bimap CP1Msg state { panel1 = _ }
update state (CP2Msg m) =
  CP.update state.panel2 m
  # bimap CP2Msg state { panel2 = _ }
...
Phew! That’s a lot of boilerplate! But more importantly, the boilerplate is not really needed here, logically speaking. We never look at any messages of the CollapsiblePanel, we never inspect its state, all we do is blindly “route” the CollapsiblePanel’s messages and state transitions. This is textbook accidental complexity.
For cases like this, Elmish supports a different mode of composition - wrapWithLocalState. This function takes a parameter of type args -> ComponentDef (for some generic type args) and returns a function args -> ReactElement. Under the hood, the ComponentDef is instantiated as a React component with its own, internal message/update/transition loop, completely independent of the parent component. The parent component may then use the args -> ReactElement function in their view and not worry about routing the child component’s state and messages.
module CollapsiblePanel where

render :: { title :: String, content :: ReactElement } -> ReactElement
render =
  wrapWithLocalState (ComponentName "CollapsiblePanel") \args ->
    { init, view: view args, update }

...

---------------------------------------------

module Parent where

import CollapsiblePanel as CP

type State = { ... } -- no mention of CP.State

data Message = ... -- no mention of CP.Message

view :: State -> Dispatch Message -> ReactElement
view state dispatch =
  ...
  , CP.render { title: "Panel 1", content: H.text "Content 1" }
  ...
  , CP.render { title: "Panel 2", content: H.text "Content 2" }
  ...

update :: State -> Message -> Transition Message State
update = ...  -- no mention of CP.update
In this example, the args type is { title :: String, content :: ReactElement }. We pass a function args -> ComponentDef to wrapWithLocalState and it returns us a function args -> ReactElement, which we name render and then use in the Parent module.
NOTE 1: the ComponentName parameter is unfortunately required due to how React works under the hood. For a detailed explanation, see docs on Pursuit.
NOTE 2: the name wrapWithLocalState will probably be changed in the future. We do not like the name, but we were unable to come up with a better alternative so far.
This mode of composition works best under these conditions:
- The “parent” component does not need access to state or messages of the “child” component.
- The “child” component’s state is trivial, not critical to the application. The underlying mechanism relies on React’s component-local state (i.e. the
this.stateproperty), which turns out to be not guaranteed from occasional unwarranted reset.
Higher-order message pattern
For more complex scenarios, you can design child components that store parent messages in their state and fire them as needed:
module Form where

type State msg =
  { value :: String
  , onChange :: String -> msg
  , onSubmit :: msg
  , onCancel :: msg
  }

data Message msg = Change String | ParentMessage msg

init :: ∀ msg.
  { onChange :: String -> msg, onSubmit :: msg, onCancel :: msg }
  -> Transition (Message msg) State
init callbacks = pure
  { value: ""
  , onChange: callbacks.onChange
  , onSubmit: callbacks.onSubmit
  , onCancel: callbacks.onCancel
  }

view :: ∀ msg. State msg -> Dispatch msg -> ReactElement
view state dispatch =
  H.form ""
  [ H.input_ ""
    { value: state.value
    , onChange: H.handle \e -> dispatch $ state.onChange (E.inputText e)
    }
  , H.button_ "" { onClick: H.handle \_ -> dispatch state.onSubmit } "Submit"
  , H.button_ "" { onClick: H.handle \_ -> dispatch state.onCancel } "Cancel"
  ]

update :: ∀ msg. State msg -> (Message msg) -> Transition (Message msg) (State msg)
update state (Change newValue) =
  pure state { value = newValue }
update state (ParentMessage _) =
  pure state
Usage in parent:
module Parent where

data Message
  = FormSubmitted
  | FormCancelled
  | FormValueChanged String
  | FormMsg (Form.Message Message)

type State =
  { form :: Form.State Message
  , formVisible :: Boolean
  , submitted :: Boolean
  }

init :: Transition Message State
init = do
  form <- Form.init
    { onChange: FormValueChanged
    , onSubmit: FormSubmitted
    , onCancel: FormCancelled
    }
  pure { form, formVisible: true, submitted: false }

update :: State -> Message -> Transition Message State
update state (FormMsg (Form.ParentMessage m)) =
  update state m  -- recursively handle parent message

update state (FormMsg m) =
  bimap FormMsg state { form = _ } $ Form.update state.form m

update state (FormValueChanged s) =
  ...

update state FormSubmitted =
  pure state { formVisible = false, submitted = true }

update state FormCancelled =
  pure state { formVisible = false }
This pattern allows child components to be highly reusable while maintaining type safety. The parent specifies exactly which messages to fire for different events.