Getting Started
- Requisite tools
- Initialize an empty project
- Minimal SPA scaffolding
- Hello World
- Interaction
- More complex events
- Effects
Requisite tools
Elmish is a PureScript library, and PureScript works with NodeJS, and that’s pretty much the only tool you’ll need to install upfront.
This tutorial assumes a basic familiarity with PureScript language as such, as well as Node and its associated tooling.
Initialize an empty project
- Create an empty directory, run
npm initto initialize a new Node project. The result should be a lonepackage.jsonfile. - Run
npm install --save purescript spago react@17 react-dom@17 esbuildto install:purescript- the PureScript compiler.spago- the PureScript package manager.reactandreact-dom- the React library, on which Elmish is based.esbuild- the fastest JavaScript bundler currently available.
- Run
npx spago initto initialize a new PureScript project in the directory. This should create a bit of scaffolding, including a couple of*.dhallfiles and ansrcdirectory withMain.pursin it. - Run
npx spago install elmish elmish-htmlto install the Elmish library and its companionelmish-html.
Minimal SPA scaffolding
-
Using your favourite text editor, create a file named
index.htmland put the following code in it:<link rel="stylesheet" href="https://cdn.jsdelivr.net/npm/bootstrap@5.1.3/dist/css/bootstrap.min.css"> <div id="app">The UI is not here yet</div> <script src="output/index.js"></script> <script>window.Main.main()</script>The second line is the container for the application to render itself in. The third line references the JavaScript bundle (result of your code compilation). The fourth line invokes the PureScript entry point function.
NOTE: we’re using Bootstrap for styling. Looks better that way.
-
Open
package.json, find thescriptssection in it, and add the following line:"start": "spago build && esbuild ./output/Main/index.js --bundle --serve --servedir=. --outfile=output/index.js --global-name=Main"This command first builds your project (via
spago build) and then starts theesbuildbundler to bundle the compilation results and simultaneously serve them with a built-in web server. -
To verify, run
npm start. This should, after a few seconds, display something along the lines of:Local: http://127.0.0.1:8000/Open that address in a browser. You should see text “The UI is not here yet”. If you don’t see that, something is wrong with the setup so far.
Hello World
To start your Elmish UI, first you’ll need to define the five elements, as explained in the overview, - State, Message, init, update, and view. We’re going to put all of this in Main.purs:
-- Nothing happens in our UI so far, so there are no messages
data Message

-- The UI is just static text, so there is no initial state
type State = Unit

-- Since there is no state, there is nothing to initialize
init :: Transition Message State
init = pure unit

-- Since there are no messages, the `update` function is also trivial
update :: State -> Message -> Transition Message State
update _ _ = pure unit

view :: State -> Dispatch Message -> ReactElement
view _ _ =
   H.div "p-4"
   [ H.text "Hello, "
   , H.strong "" "World!"
   ]
NOTE: the H.div function takes a CSS class as the first parameter, and so does the H.strong function. This style works very well with Bootstrap (where most elements have a class), but it’s not the only choice. See Rendering HTML for more.
To make that compile, you’ll need the following imports:
import Elmish (Transition, Dispatch, ReactElement, (<|))
import Elmish.HTML.Events as E  -- This is more convenient to import qualified
import Elmish.HTML.Styled as H  -- This is more convenient to import qualified
import Elmish.Boot (defaultMain) -- We'll need this in a moment
Now all that remains is to hook that up to the entry point. To do that, put the following in main:
main :: Effect Unit
main = defaultMain { def: { init, view, update }, elementId: "app" }
Now save and refresh your browser. Assuming you still have npm start running, you should see “Hello, World!” on the screen.
Interaction
Now let’s add some interaction. We’ll do the simplest kind for now: a button click. To do that, we’ll need a message to describe the click:
- data Message
+ data Message = ButtonClicked
And in order for the button to have a visible effect, we’ll add some state for it to change:
- type State = Unit
+ type State = { word :: String }
The init function should provide initial state of the right type:
  init :: Transition Message State
- init = pure unit
+ init = pure { word: "World" }
And the update function should react to the button click by updating the state:
  update :: State -> Message -> Transition Message State
- update _ _ = pure unit
+ update state ButtonClicked = pure state { word = "Elmish" }
And finally, the view function should add a button:
  view :: State -> Dispatch Message -> ReactElement
- view _ _ =
+ view state dispatch =
     H.div "p-4"
+    [ H.div ""
       [ H.text "Hello, "
-      , H.strong "" "World!"
+      , H.strong "" state.word
       , H.text "! "
       ]
+    , H.button_ "btn btn-primary mt-3" { onClick: dispatch <| ButtonClicked } "Click me!"
     ]
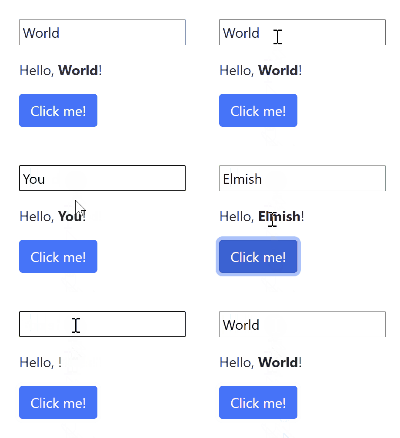
If you refresh your browser now, you should see this:

NOTE: we just introduced the first prop (onClick) passed to a DOM element (button). For a more detailed discussion of props, see Rendering HTML.
More complex events
The onClick event we used above is nice, but it’s a limited example of an event: it doesn’t have any parameters, but most events do.
The elmish-html library models all events of standard DOM elements as an effectful function (i.e. EffectFn1) taking a Foreign parameter, even though the underlying value is actually React Synthetic Event. Mostly this is because it’s still a work in progress. Events may get a more interesting type in the future.
But for now, the idea is to get the Foreign parameter and extract interesting values from it via readForeign, which is a standard Elmish mechanism for dealing with JS values of unknown nature (see here for more on it).
To illustrate this, let’s add a textbox to our application to let the user edit the text:
- data Message = ButtonClicked
+ data Message
+   = ButtonClicked
+   | WordChanged String

  type State = { word :: String }

  init :: Transition Message State
  init = pure { word: "World" }

  update :: State -> Message -> Transition Message State
  update state ButtonClicked = pure state { word = "Elmish" }
+ update state (WordChanged s) = pure state { word = s }

  view :: State -> Dispatch Message -> ReactElement
  view state dispatch =
    H.div "p-4"
+   [ H.input_ "d-block"
+     { type: "text"
+     , value: state.word
+     , onChange: dispatch <| \event -> WordChanged (E.inputText event)
+     }
    , H.div "mt-3"
      [ H.text "Hello, "
      , H.strong "" state.word
      , H.text "! "
      ]
    , H.button_ "btn btn-primary mt-3" { onClick: dispatch <| ButtonClicked } "Click me!"
    ]

Effects
It is a rare UI that comes without effects - something that happens outside the UI, be it local storage, timers, communication with a server, and so on.
In Elmish effects are defined by the update function. Its return type Transition Message State encodes the new (“updated”) state and zero or more effects that should happen as a result of this state transition (hence the name Transition).
Let’s add a simple effect as a result of our ButtonClicked message: output a line to the console.
+ import Effect.Class.Console (log)
- import Elmish (Transition, Dispatch, ReactElement, (<|))
+ import Elmish (Transition, Dispatch, ReactElement, forkVoid, (<|))

...

  update :: State -> Message -> Transition Message State
- update state ButtonClicked = pure state { word = "Elmish" }
+ update state ButtonClicked = do
+   forkVoid $ log "Button clicked"
+   pure state { word = "Elmish" }
  update state (WordChanged s) = pure state { word = s }
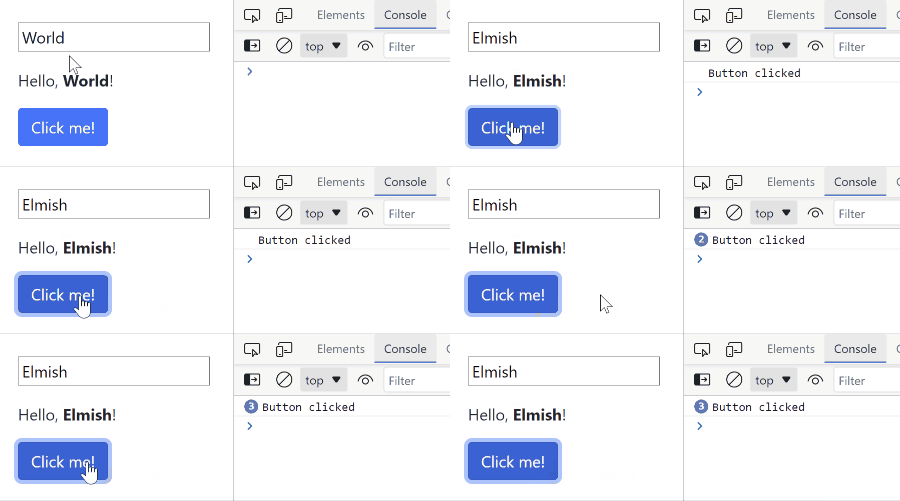
If you refresh your browser now and open console in the developer tools, you should see something like this:

The forkVoid function adds an effect to the current state transition. The “void” suffix means that the effect does not produce any more messages.
But most effects do eventually produce a message. Think of a server interaction: in most cases the server response has to affect the UI somehow. To achieve this, use the function fork (without the “void” suffix).
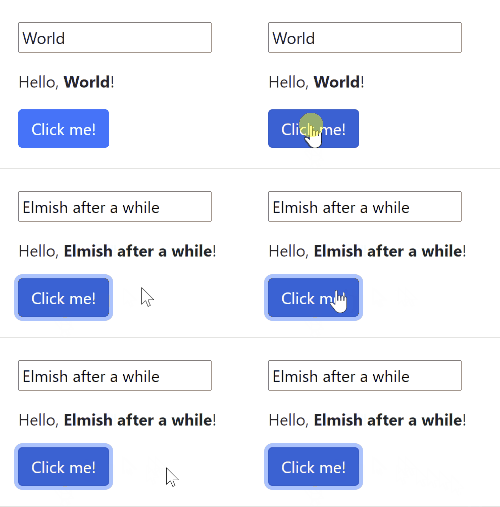
Server communication is a bit too complicated for this tutorial, so let’s add a timer instead:
+ import Effect.Aff (Milliseconds(..), delay)
  import Effect.Class.Console (log)
- import Elmish (Dispatch, ReactElement, Transition, forkVoid, (<|))
+ import Elmish (Dispatch, ReactElement, Transition, fork, forkVoid, (<|))

...

  data Message
    = ButtonClicked
    | WordChanged String
+   | TimeoutElapsed

...

  update :: State -> Message -> Transition Message State
  update state ButtonClicked = do
    forkVoid $ log "Button clicked"
+   fork do
+     delay $ Milliseconds 1000.0
+     pure TimeoutElapsed
    pure state { word = "Elmish" }
  update state (WordChanged s) =
    pure state { word = s }
+ update state TimeoutElapsed =
+   pure state { word = state.word <> " after a while" }

NOTE: there are many more ways to work with effects. For more information please see the page about state transitions